This article shows how to turn a Github outbound webhook into a Ryver chat message.
Using Github outbound webhooks
Github supports outbound webhooks for various events. You can filter which events trigger the webhook call. In this example, we’re focusing on the push event.
Setting up your Github webhook:
- In Ryver, create a new custom chat message webhook, applying the transformation provided below.
- On the transform step of the Create Webhook wizard, you can get a sample Github push payload here.
- Click the Test button, paste the payload.
- Click the Transform button.
- Click Preview to see what the message will look like in Ryver.
- Play with the transformation template to get the message looking the way you want.
- In your Github repository, go to Settings > Webhooks and click Add Webhook.
- Paste the Ryver webhook URL and set the Content Type to application/json.
- Select the events you want to trigger your webhook. For this example, you can just select “just the push event”.
- Save your Github webhook.
Transformation
Here is an example transformation for converting the Github outbound webhook format into a simple Ryver incoming webhook format. Note that we’re using markdown formatting to put the commit information into a friendly table format.
{
 "body": "**{{ pusher.name }}** pushed to [{{ repository.name }}]({{ repository.url }}), {{ref}} ([compare]({{ compare }}))\n| Name | Message | Commit |\n|:---|:---|:--:|\n{% query $.commits.* %}| {{ author.name }} | {{ message }} | [link]({{ url }})\n{% endquery %}"
}
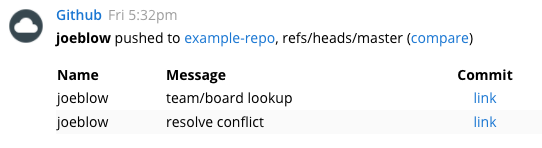
Result
And here you can see the result of the Github webhook transformation in Ryver: